Camera Configuration
Before adding a camera to Scrypted, the stream settings are configured for max compatibility with HomeKit, Google Home, Alexa, and Scrypted NVR. The steps below detail the optimal settings for these streaming destinations.
Camera Administration
Open the Camera's web admin page or app to configure its codecs, motion sensor, and other various settings. Some cameras may not have a configuration tool. Cloud cameras like Ring, Google, and Arlo should continue on to Adding the Camera.
Authentication Setup
Ensure the camera password is a simple alphanumeric phrase. Special characters often cause issues when authenticating with RTSP, HTTP, or other camera services. If the camera supports both Basic and Digest Authorization, configure it for Digest only, which is more secure.
WARNING
The camera login must have administrator level access. Motion event reporting and camera auto configuration is only available to administrator accounts.
WARNING
Reolink cameras must use simple alphanumeric passwords or the stream will fail to load.
Stream Setup
Streams must be set up to enable all available video and audio streams and configuring the codecs for compatibility with HomeKit, Scrypted NVR, etc.
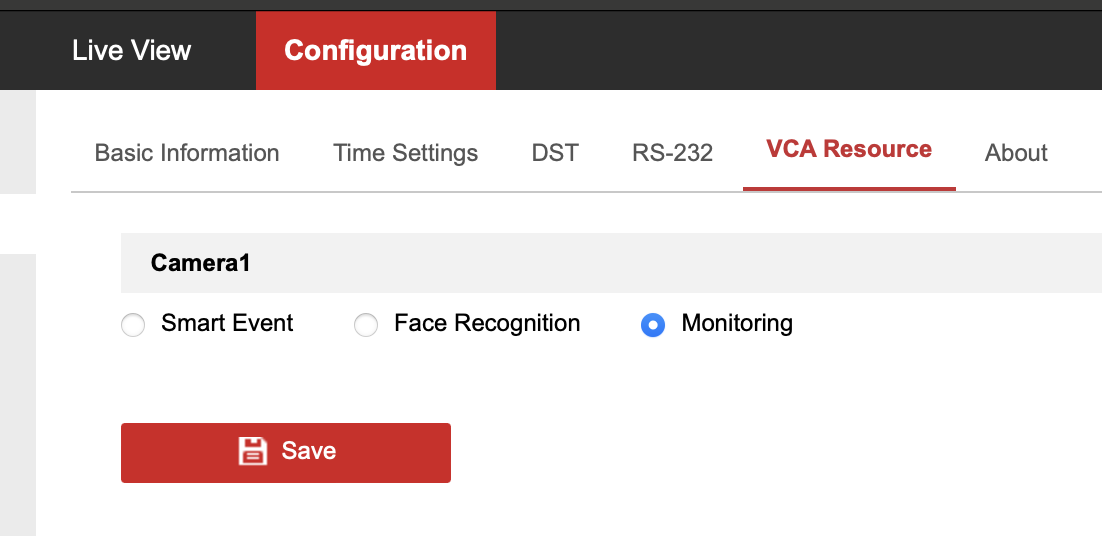
Disable on Camera AI
Some cameras, such as Hikvision or Amcrest, expose more streams and Framerate options when on camera AI is disabled. This feature is not used by Scrypted NVR or HomeKit, and should be disabled for improved streaming performance. Hikvision's VCA Resource, for example, should be set to Monitoring.
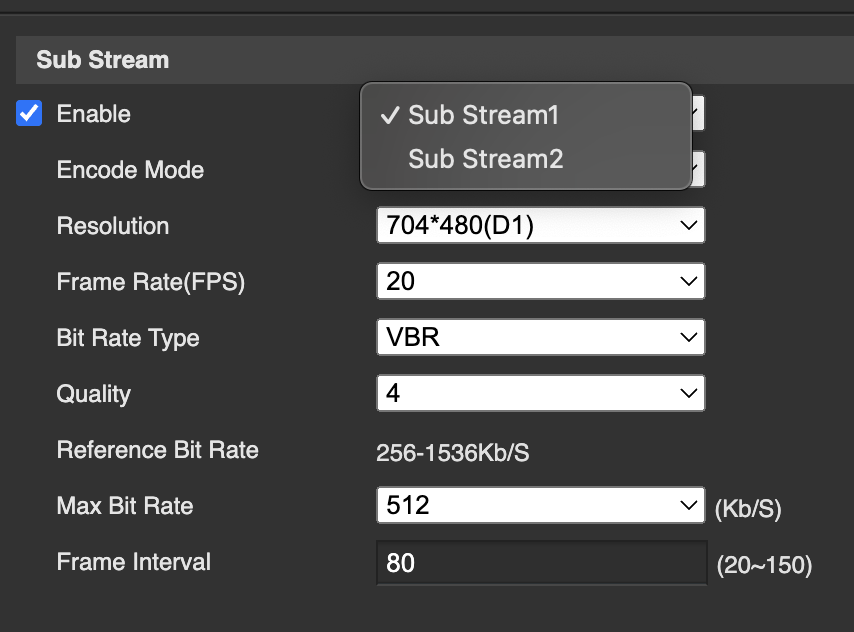
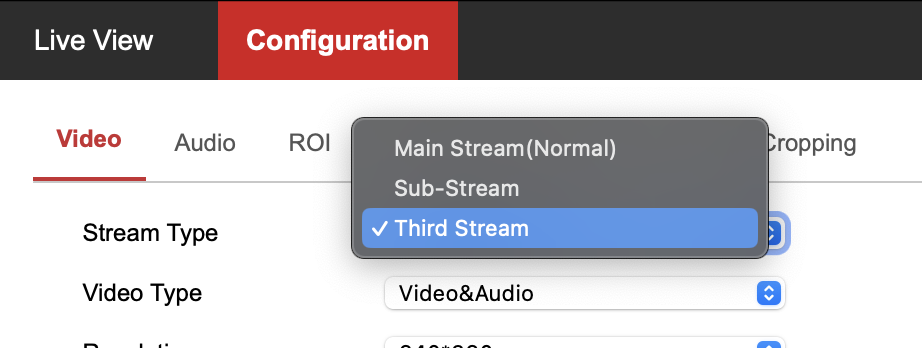
Enable all Streams
Enable the all available streams on the camera. Scrypted will use multiple streams, if available, for different purposes (remote streaming, analysis, etc). Most cameras will have one one Main Stream and one Substream. Some may only have a Main Stream. Cameras with one Main Stream and two Substreams are ideal.
If there are multiple substreams, check the substreams in the dropdown or list to ensure they are all enabled. Ensure audio is also enabled on all the streams. 4K Hikvision and Amcrest, for example, have 1 main stream and 2 substreams. Note that the Hikvision is set to Video&Audio to ensure audio playback:

TIP
Hikvision and other camera models require that the Report to Surveillance Center Option is checked.
Video Setup
H.264 Video Codec
TIP
HomeKit, Google Home, Alexa, and the web all require H.264 for live streaming.
Cameras encoding H.265 will suffer severe picture quality degradation during playback due to transcoding (in addition to the massively increased CPU usage and latency). Thus it is highly recommended that cameras encode H.264 natively.
Reolink cameras only output H.265 in 4k mode, but will use H.264 if the resolution is lowered to 2k. Even though the resolution is lower, the picture quality at native 2k is better than transcoded 4k.
Unifi Protect's Enhanced Mode changes the codec to H.265 and should be disabled.
Set all the stream video codecs to H.264 (M or Main profile if specifiable). Do NOT use H.264+, Super H.264, etc: TURN OFF/DISABLE ALL SPECIAL VARIANTS. Sometimes this unsupported variant setting is called Smart Code(c) and it should be set to Close or Off.
Main Stream Setup
If the camera only has a single main stream, configure it as 1920x1080 and 2 Mbit. The camera may support a higher resolution, but without substreams, it is recommended to use balanced settings. Otherwise, use the max available resolution for the Main Stream.
| Main Stream Resolution | Bitrate |
|---|---|
| 3840x2160 | 8 Mbit, Variable/VBR |
| 2688x1520 | 3.5 Mbit, Variable/VBR |
| 1920x1080 | 2 Mbit, Variable/VBR |
Sub Stream(s) Setup
| Stream | Max Resolution | Bitrate |
|---|---|---|
| Substream 1 or 2 | 1280x720 | 1 Mbit, variable |
| Substream 1 or 2 | 640x360 | 500 Kbit, variable |
Framerate Settings
Configuring the camera frame rate involves changing two related settings: the Frame Rate and the Frame Interval (also sometimes referred to as Keyframe Interval, I-Frame Interval, or Interframe Space). Cameras will allow configuration either the Interval or Space. Use the settings guide below.
| Frame Rate | Interval | Space |
|---|---|---|
| 20 | 80 | 4 (or 2) |
If Frame Rate of 20 is unavailable, 10 can be used instead.
| Frame Rate | Interval | Space |
|---|---|---|
| 10 | 40 | 4 (or 2) |
Framerate Explanation
- Any
Frame Ratebetween 10 and 30 is fine, and the chosenFrame Ratewill determine theFrame Interval. - A
4 (or 2) second frequency, aka theInterframe Space, can be used to compute theFrame Interval.Interframe Spaceis the number of seconds between keyframes.Frame Intervalis the number frames between keyframes.- Cameras are typically configured in
Frame Interval. The formula forFrame Intervalvalue is:Frame Interval = 4 seconds * Frame Rate. Examples:- If
Frame Rateis30,Frame Intervalshould be set to120. - If
Frame Rateis20,Frame Intervalshould be set to80. - If
Frame Rateis10,Frame Intervalshould be set to40.
- If
Audio Setup
Configure the audio codec on all streams by manufacturer recommendation below, and codec availability.
| Manufacturer | Codec | Sample Rate |
|---|---|---|
| Amcrest/Dahua | AAC | 8000 |
| Other Manufacturer | PCM-ulaw/G711u/G711mulaw | 8000 |
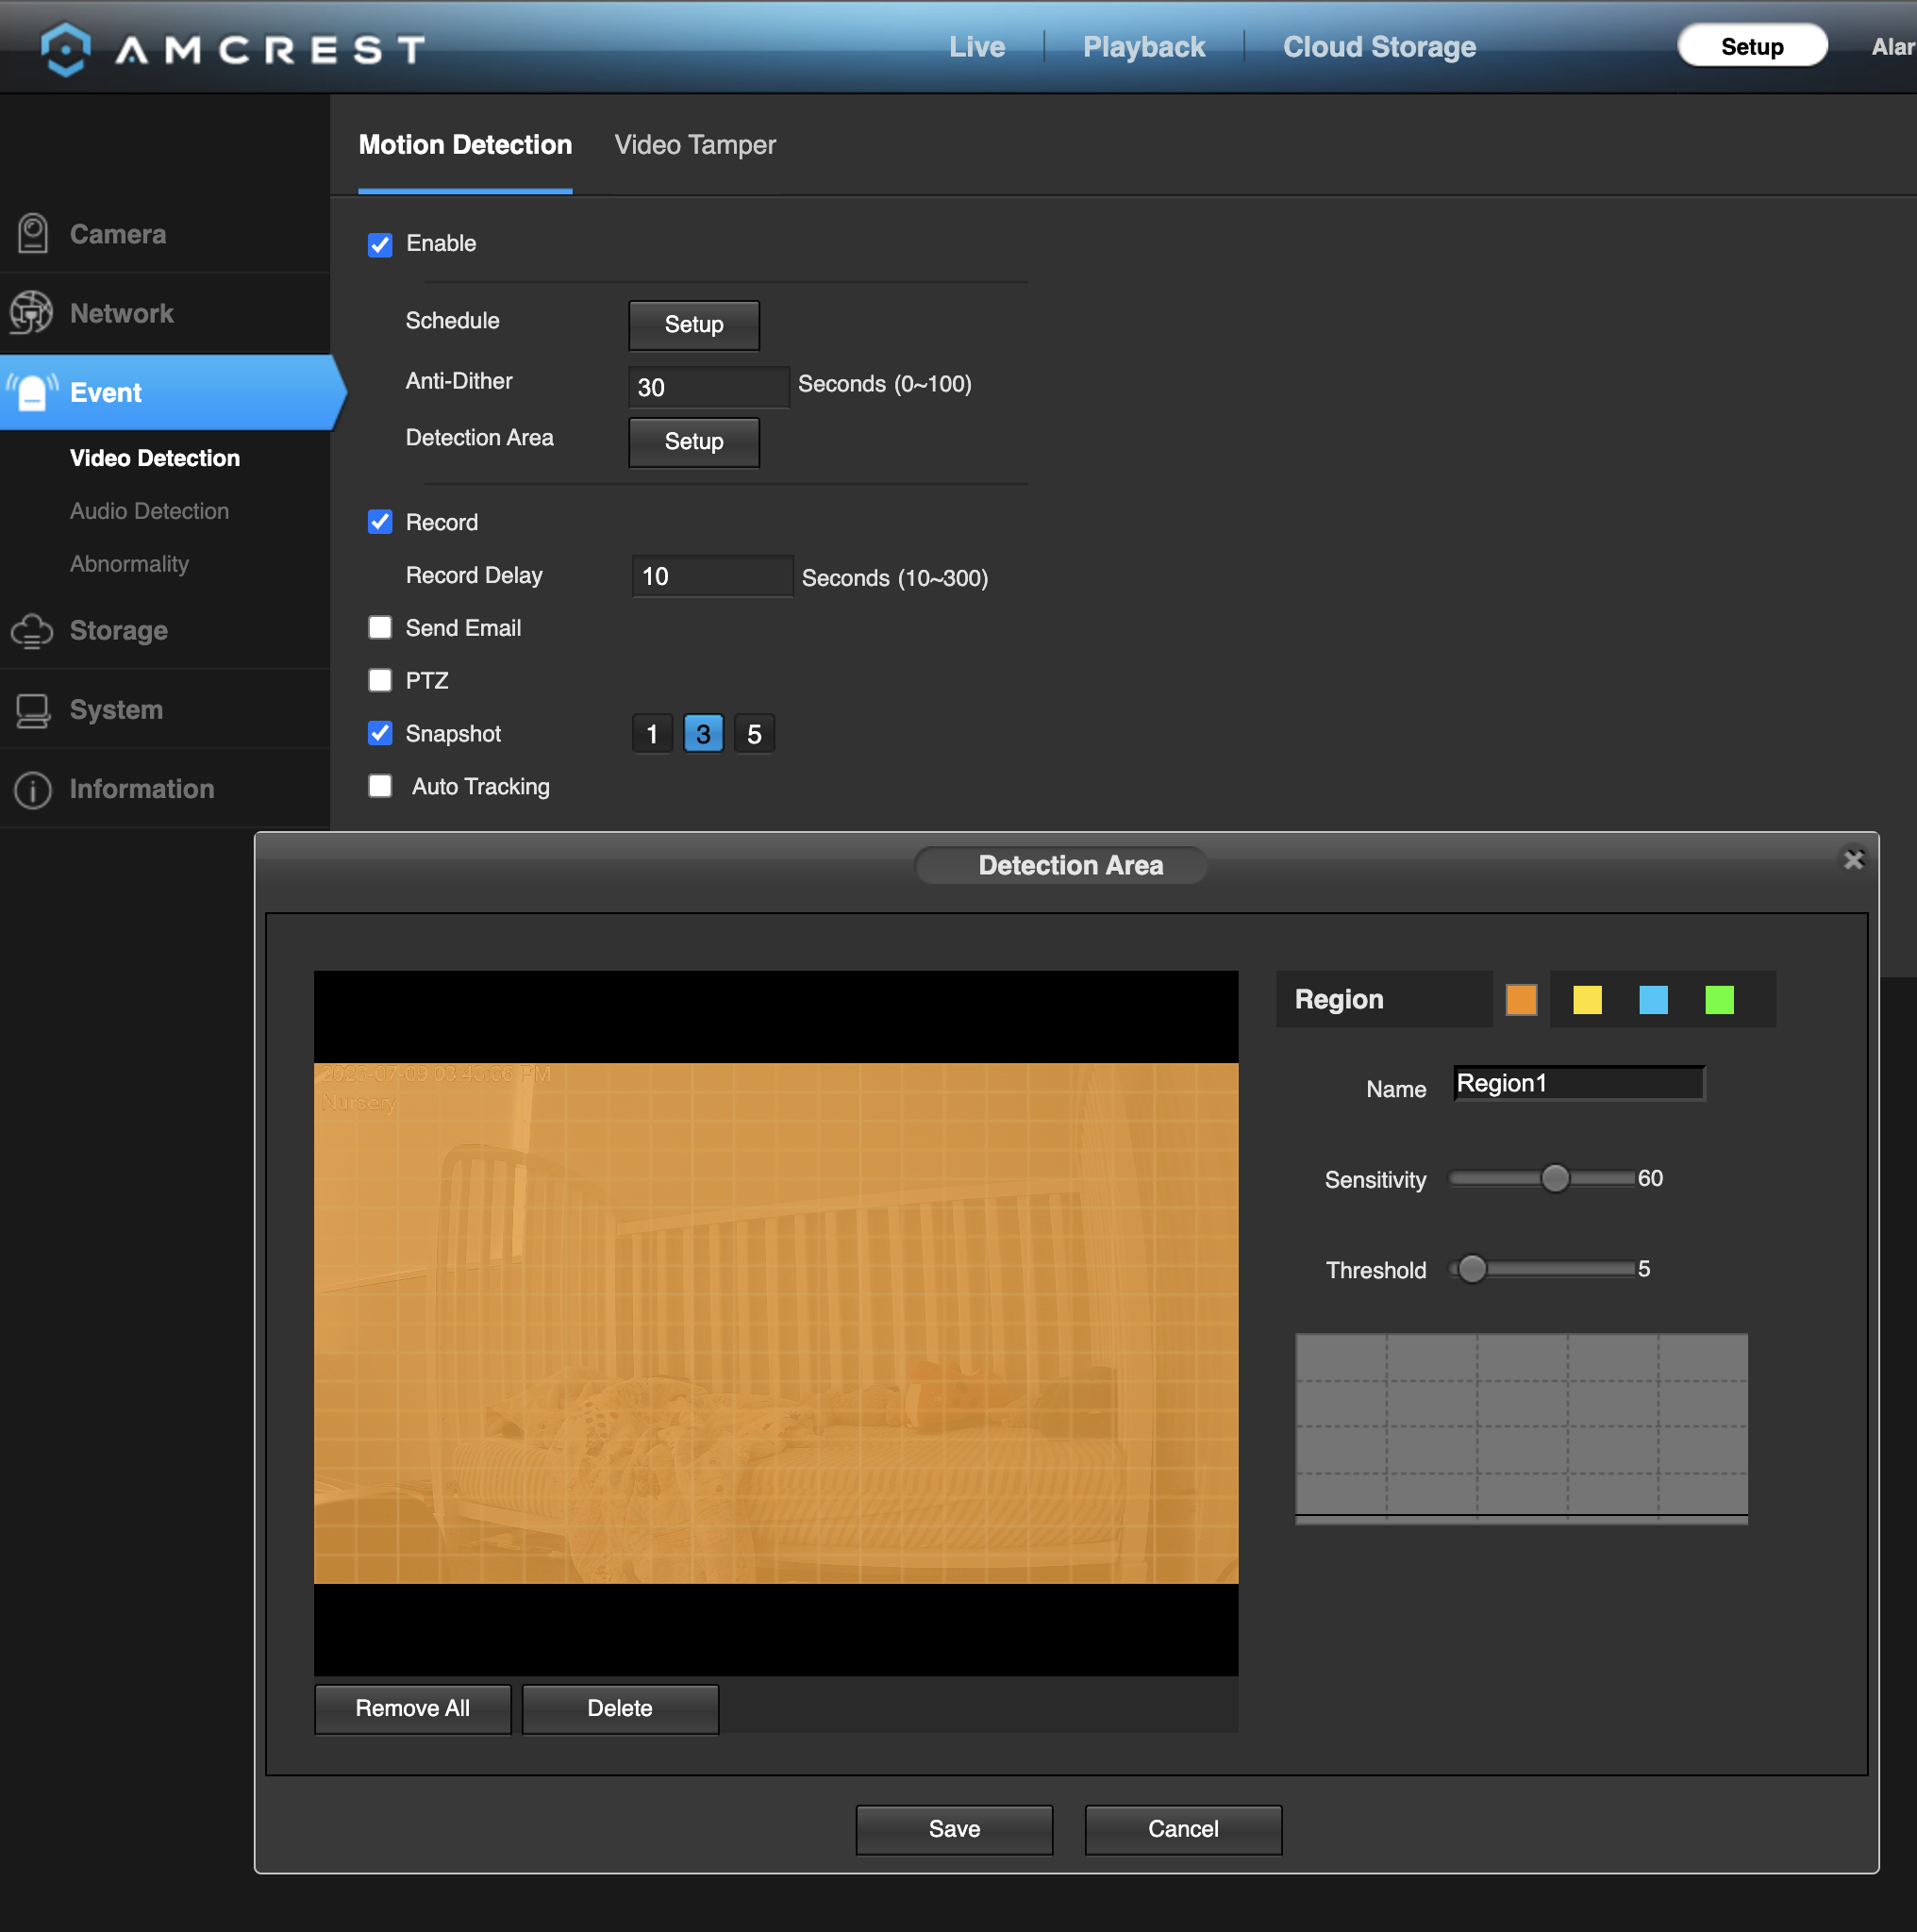
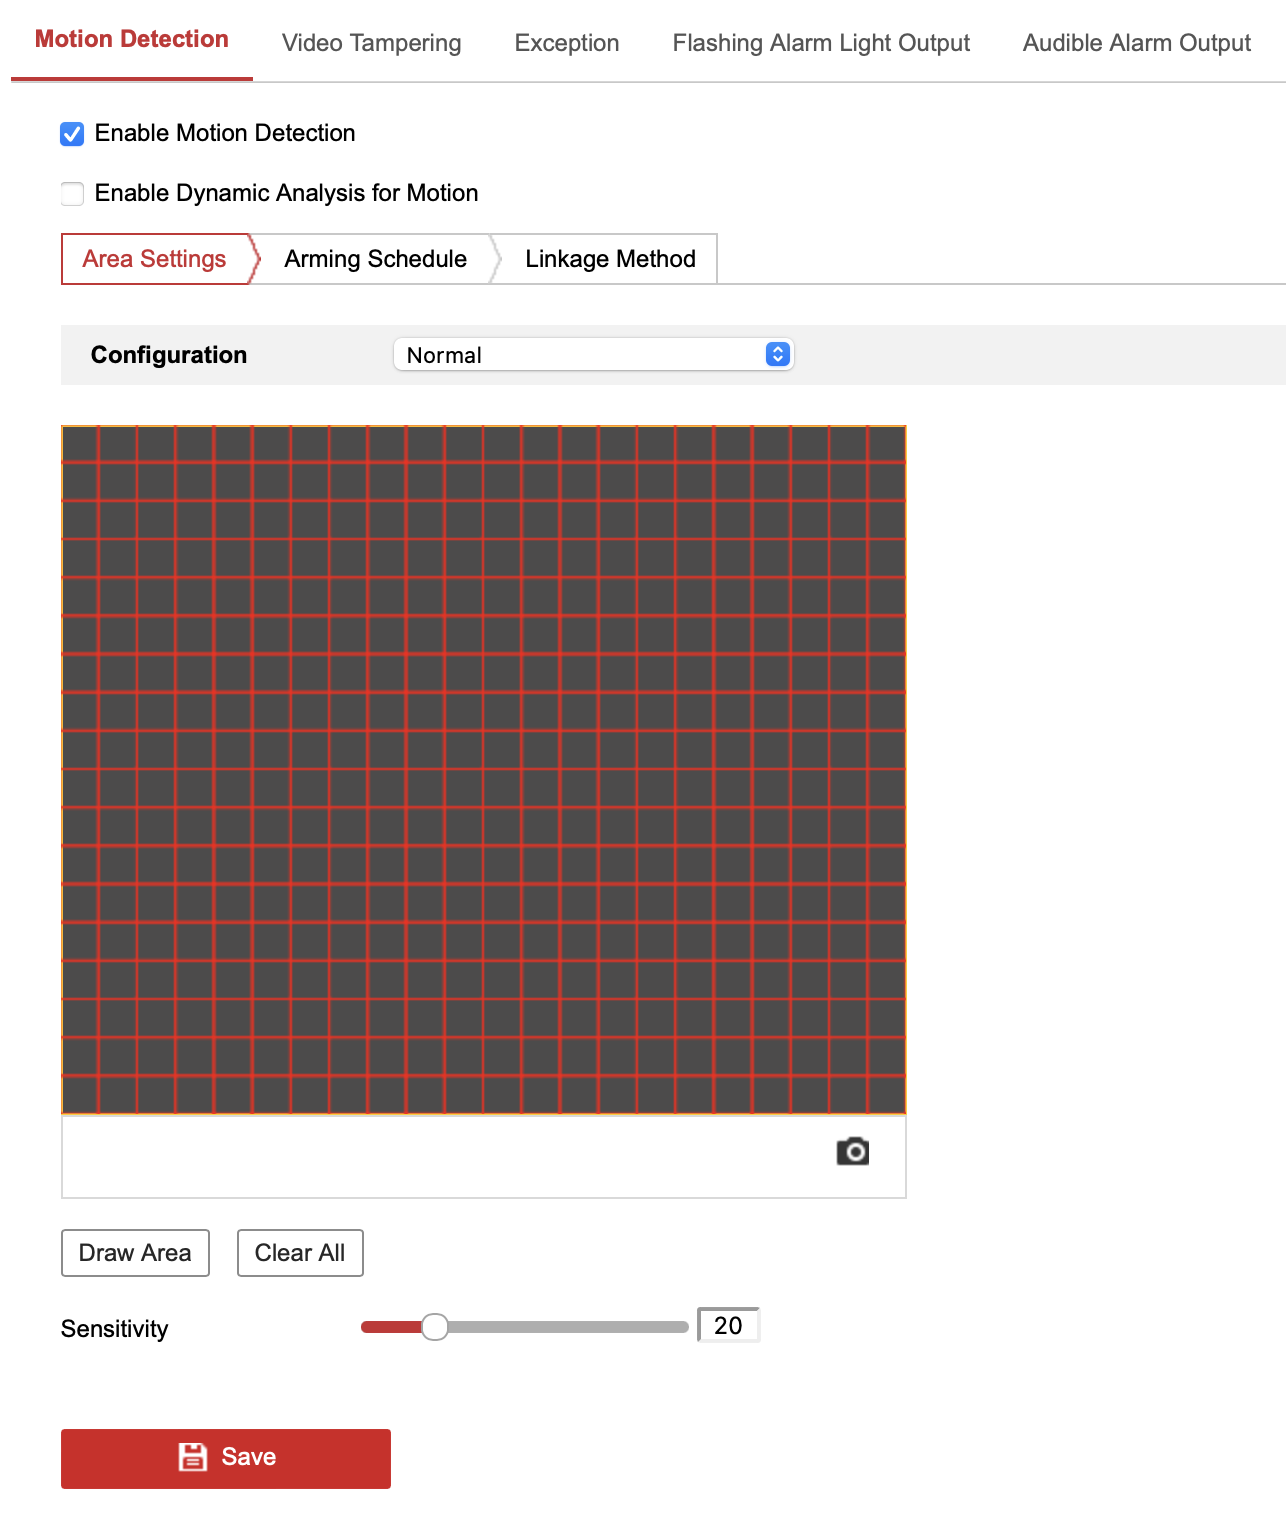
Motion Sensor Setup
Most cameras have a built in motion sensor. It may be disabled by default, or have a blank activity zone. For optimal results, it is highly recommended to configure the motion zones to filter extraneous activity:
- Trees, bushes, or other objects that may trigger motion via wind.
- Camera facing a busy road will trigger motion on every passing car.
If the camera does not have a motion sensor, use a Motion Detection Plugin to enable sofware motion detection.
Enable ONVIF
ONVIF is a standard camera communication channel for motion, snapshots, two way audio, codecs configuration. and pan/tilt/zoom. It is available on most Local cameras and should be enabled (even if not using the ONVIF Plugin).
- Enable
ONVIFon the camera. - Some cameras require entering a separate username and password for the ONVIF service. Ensure the
ONVIFservice has a user set up with the same username and password credentials used for the camera itself.