Home Assistant
The Scrypted Custom Component for Home Assistant adds support for managing Scrypted from your Home Assistant Dashboard, and creation of Scrypted NVR cards. A demo of the cards is available on the Scrypted NVR Home Assistant Demo Site.
Addon Setup
TIP
The Custom Component must be installed even if using the Scrypted Home Assistant Addon.
If Scrypted was installed via the Home Assistant Addon, complete the following steps, otherwise continue on to Install Custom Component.
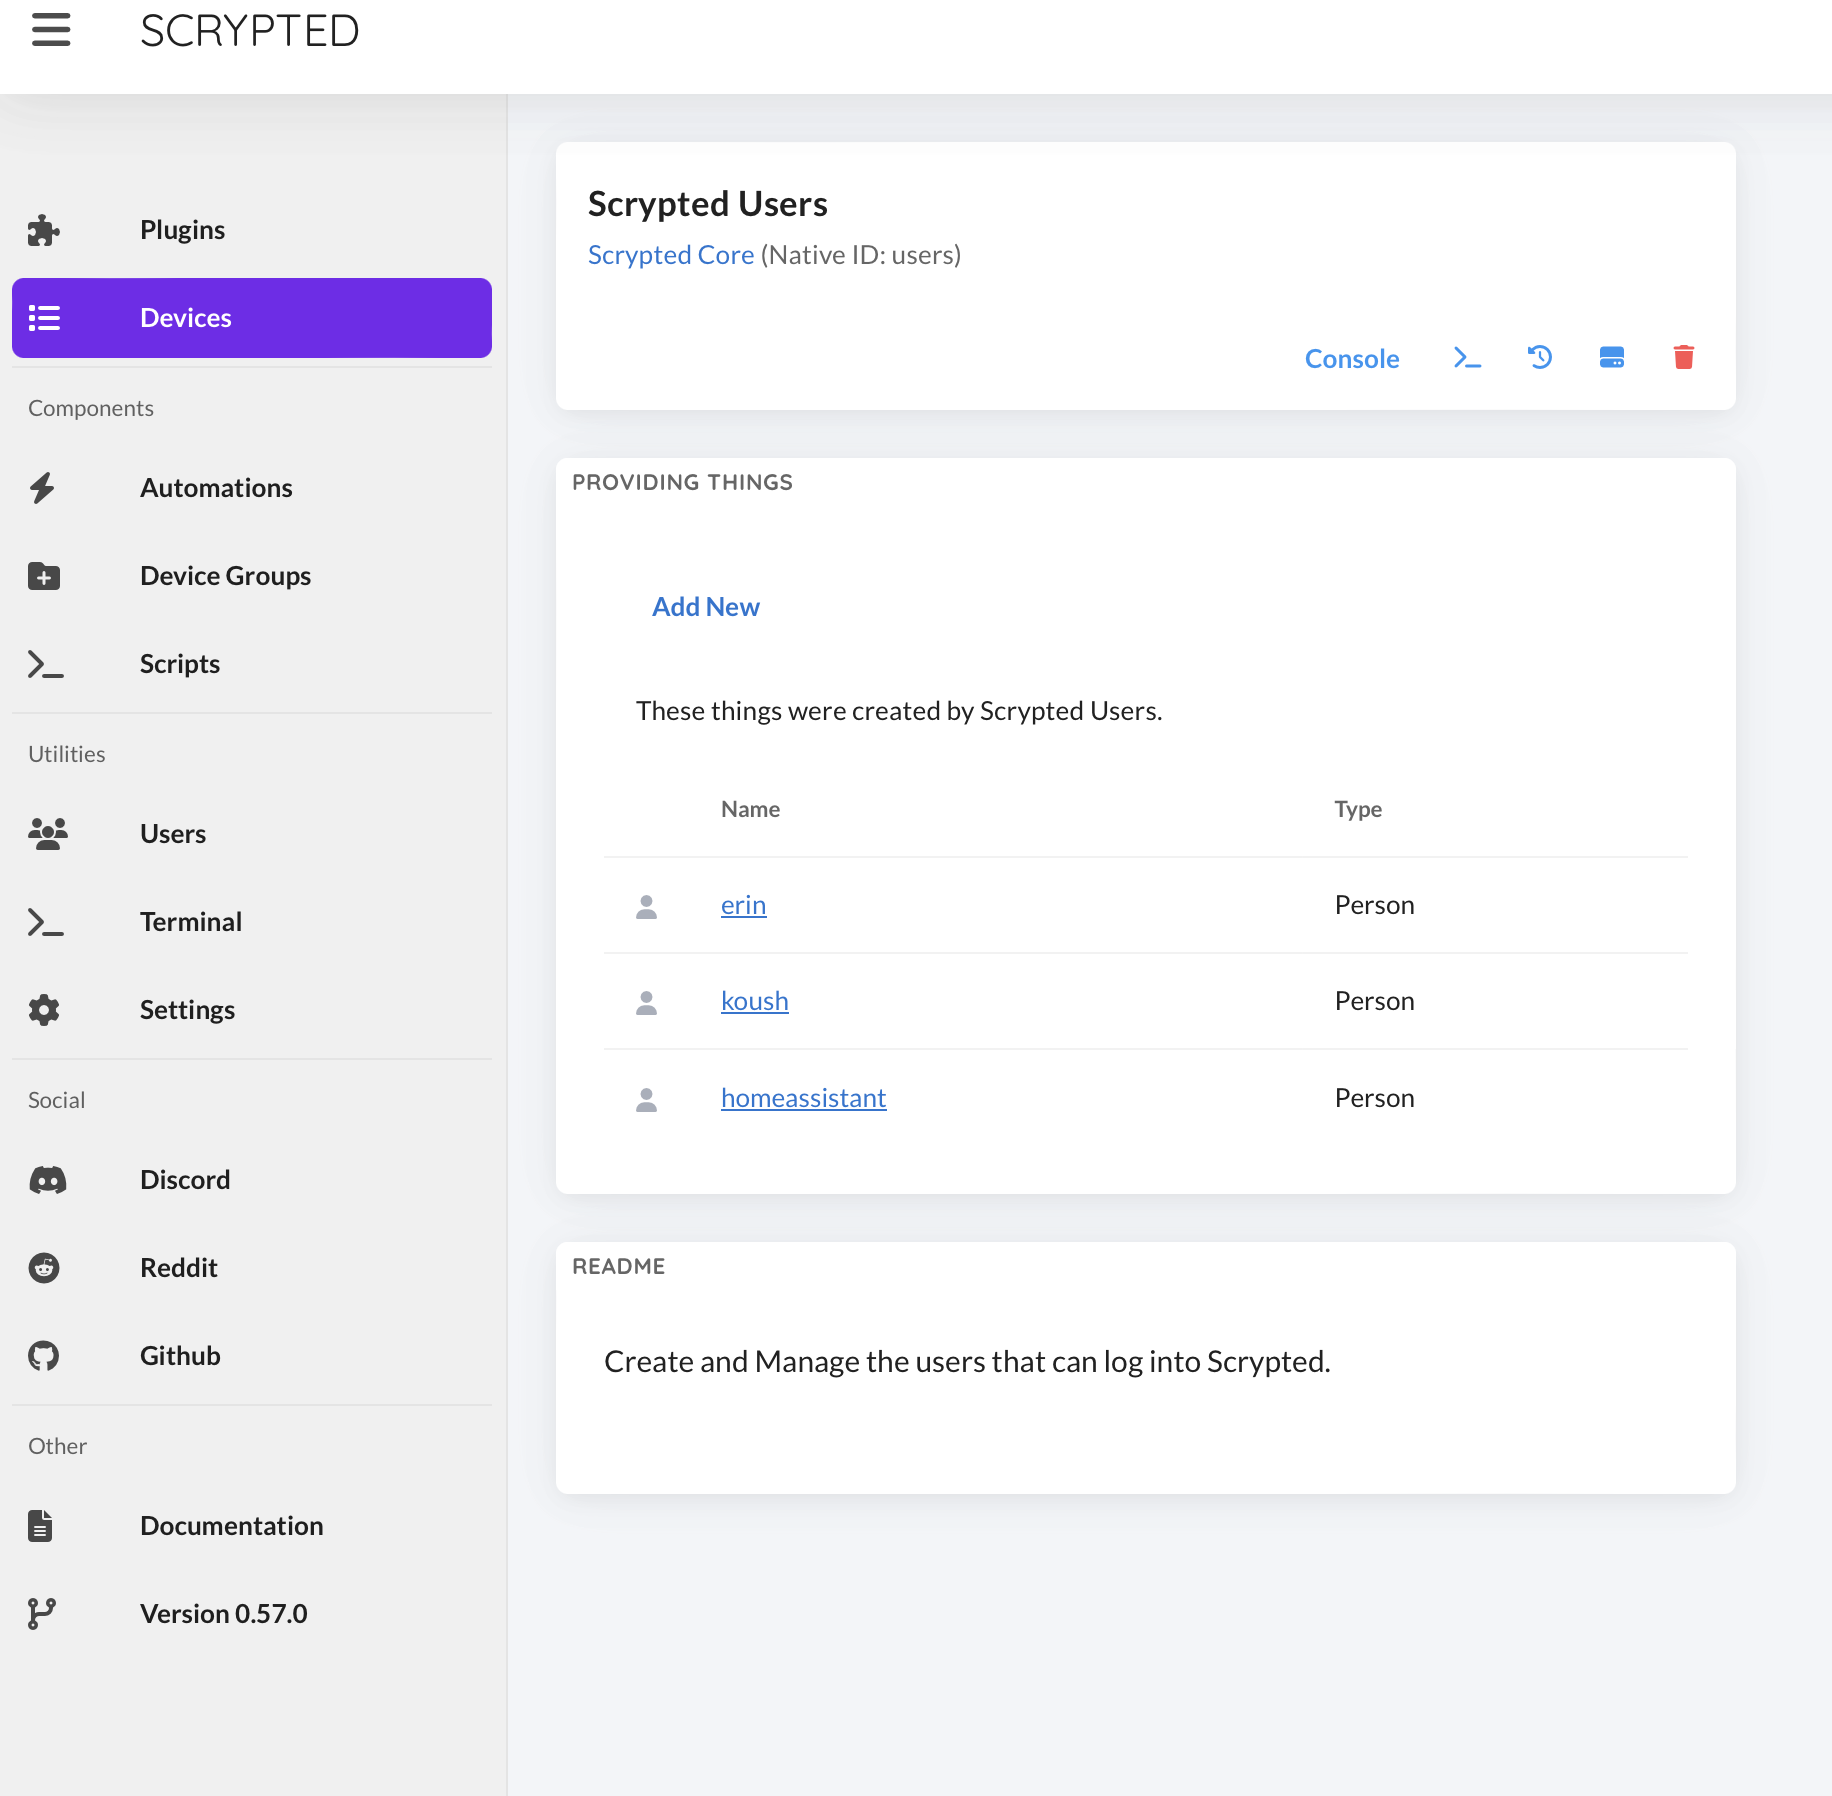
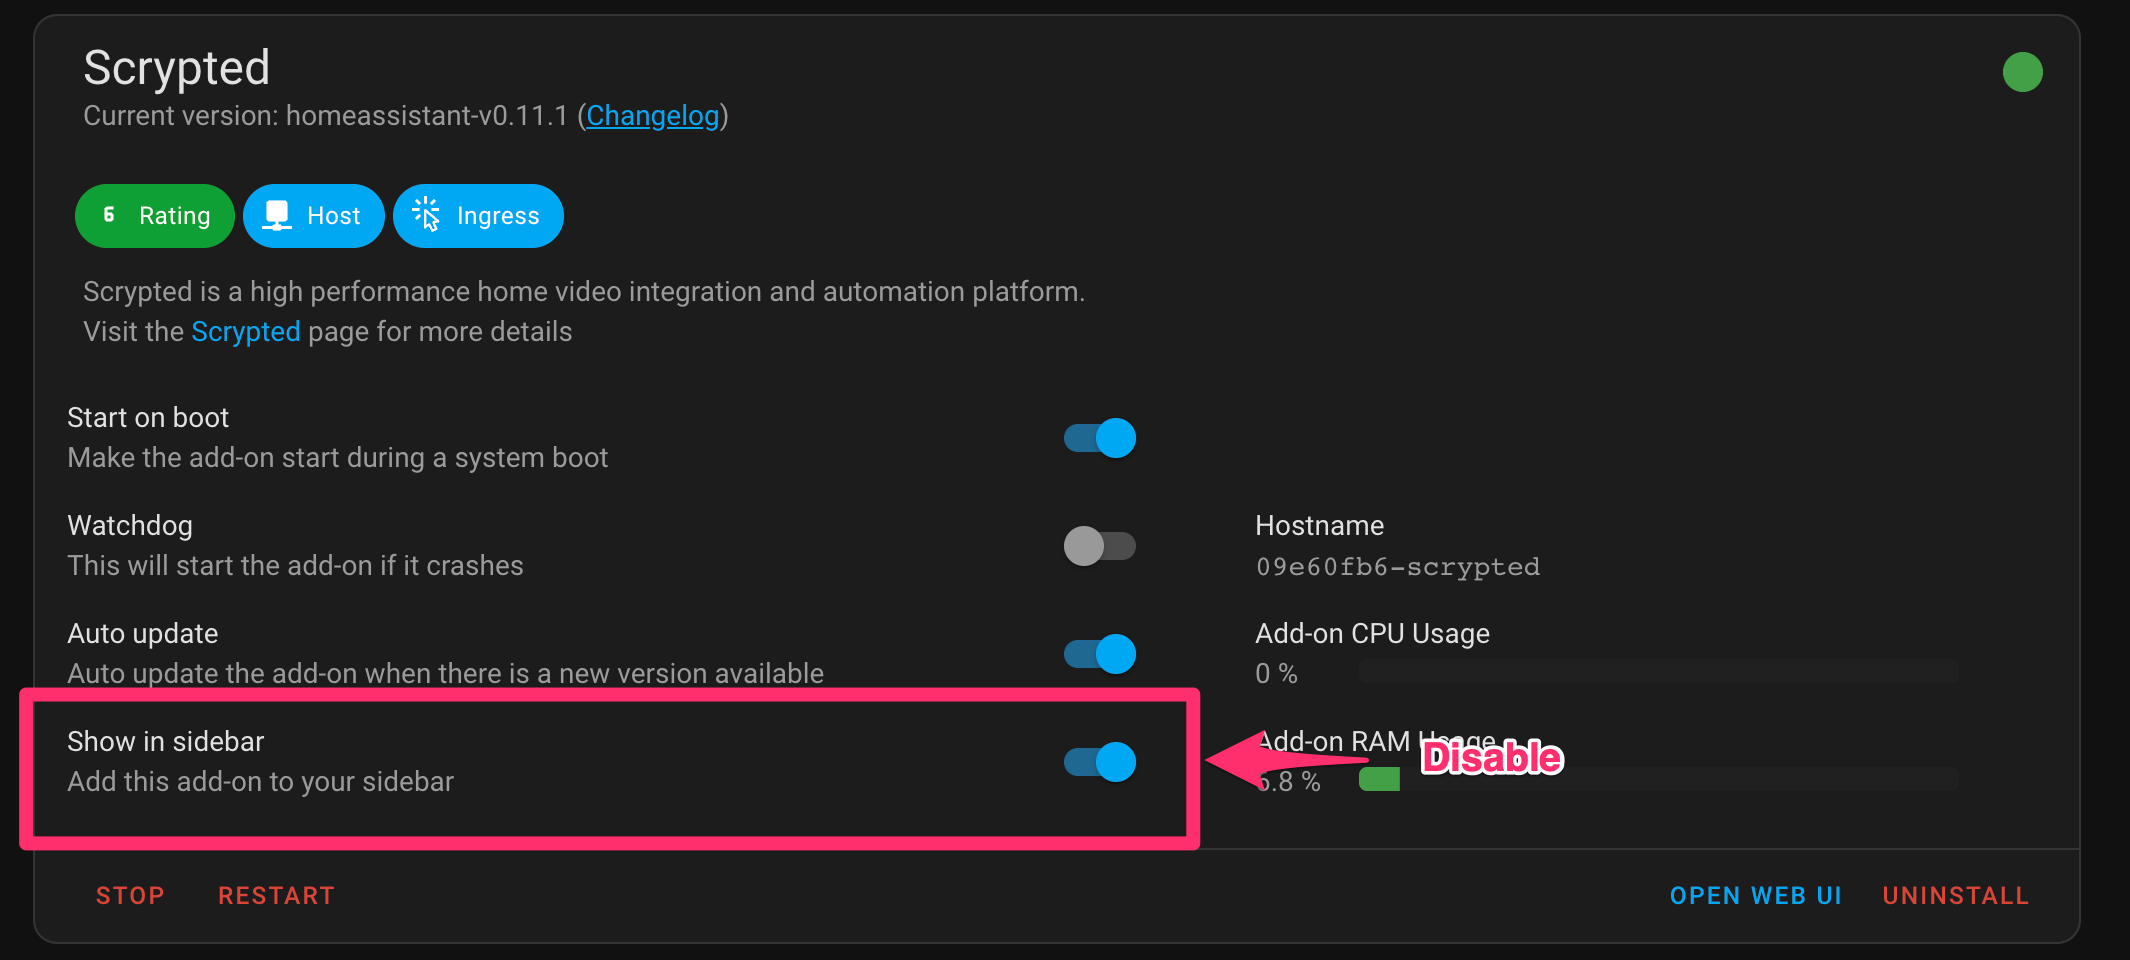
- Navigate to the Scrypted Addon in the Home Assistant sidebar. A separate dedicated Scrypted
adminmust be created inUsersin the sidebar menu (the defaulthomeassistantautomatic login user can not be used).
- Now, remove the
Scryptedsidebar item via the Addon configuration. The custom component will supercede the addon sidebar item.
Install Custom Component
The Scrypted Custom Component repository can be found on github.
- Install the custom component using the Home Assistant Community Store (HACS) by adding the
Custom Repository:
https://github.com/koush/ha_scrypted- In the HACS panel, select
Scryptedfrom the repository list and select theINSTALLbutton. - Go to
Settings > Devices & Services > Add Integrationand selectScrypted. - Enter the host, username, and password for your Scrypted server, as well as a name and icon for the side panel link in the Home Assistant menu.
| Setting | Sample Configuration |
|---|---|
| Host | 192.168.2.124:10443 |
| Username | admin |
| Password | swordfish! |
TIP
If Scrypted was installed as a Home Assistant Addon, there is no default login. A dedicated admin account will need to be created for the custom component. The Host will be 127.0.0.1:10443.
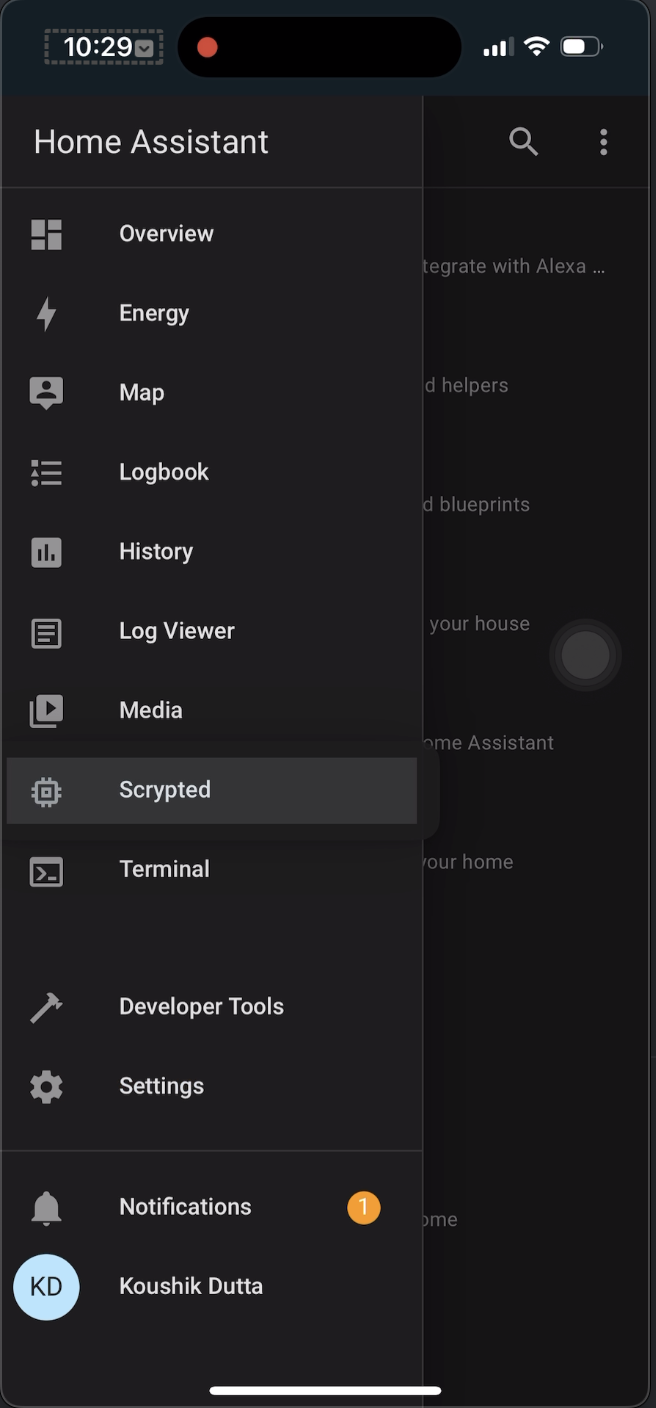
Scrypted can now be accessed in the Home Assistant side panel.
Card Setup
Scrypted NVR provides Home Assistant cards that feature low latency playback and two way audio. The NVR app is also deeply integrated into the Home Assistant UI.
There are two types of cards available:
- Camera Card
- Event Reel Card
Custom Card Installation
WARNING
The Custom Card Installation step only needs to be done one time to make the Custom Cards available for usage. Do not add the Resources to Home Assistant twice.
To begin using the Scrypted NVR Cards, you must first register the Custom Card javascript and css Resources in Home Assistant. Prepare the following paths by replacing <token> as appropriate with the same value from the Custom Component setup.
JavaScript Resource:
/api/scrypted/<token>/endpoint/@scrypted/nvr/assets/web-components.jsCSS Resource:
/api/scrypted/<token>/endpoint/@scrypted/nvr/assets/web-components.cssThen Register the Resources in Home Assistant.
Add Custom Card
Follow the instructions below, and then substitute the card id appopriately.
- Open Scrypted NVR inside Home Assistant using a desktop browser.
- Navigate to the camera.
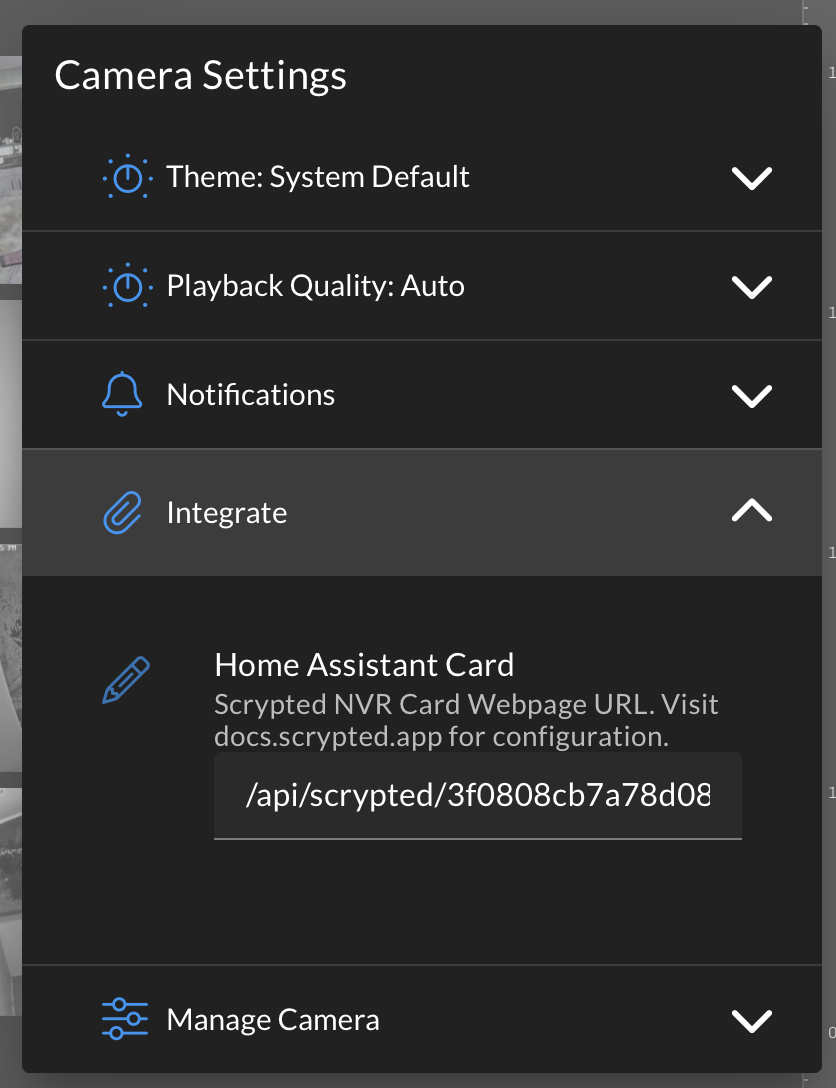
- Open the the
Camera Settings. - Copy the
Scrypted NVR Card id. This id can be used in either the Camera or Event Reel Card.
WARNING
If the Home Assistant Integrate configuration is unavailable, verify the following:
- Scrypted must be opened from inside Home Assistant. The Home Assistant integration configuration is only available from inside Home Assistant.
- The Custom Component (and Addon setup, if applicable) must correctly be completed prior to setting up the cards.
- The Integration URL is available within the camera's settings reachable by clicking the settings icon under the camera playback view. Not to be confused with the primary NVR app settings.
- Add the following
Manual Cardin Home Assistant and replace/paste the previously copiedScrypted NVR Card idbelow:
type: custom:scrypted-nvr-camera
id: 42
Camera Card Options
The Scrypted NVR card behavior can be configured using yaml parameters.
Auto Play
Play the card video on load.
type: custom:scrypted-nvr-camera
id: 42
live: true
Image Click
The parameter imageClick can be used to customize how click events are handled when the snapshot is clicked.
| Value | Description |
|---|---|
ha | Navigate to the camera inside Scrypted within the Home Assistant companion app when clicked. |
popup | View the camera in a popup. |
popup-no-timeline | View the camera in a popup with no recording playback timeline. |
app | Open the Scrypted NVR app when clicked. |
none | Do nothing when clicked. |
Example: Open Scrypted NVR Timeline in Home Assistant when the still image is clicked.
type: custom:scrypted-nvr-camera
id: 42
imageClick: ha
Video Click
The parameter videoClick can be used to customize how click events are handled when the live video is clicked.
| Value | Description |
|---|---|
ha | Navigate to the camera inside Scrypted within the Home Assistant companion app when clicked. |
popup | View the camera in a popup. |
popup-no-timeline | View the camera in a popup with no recording playback timeline. |
app | Open the Scrypted NVR app when clicked. |
none | Do nothing when clicked. |
Example: Open Scrypted NVR Timeline in Home Assistant when the playing video is clicked.
type: custom:scrypted-nvr-camera
id: 42
videoClick: ha
Theme
The parameter theme can be used to customize the light or dark theme of the popup window.
| Value | Description |
|---|---|
light | Light theme. |
dark | Dark theme. |
type: custom:scrypted-nvr-camera
id: 42
theme: dark
Resolution
By default the Card live stream will dynamically assign a stream based on card size. However, in most cases it's recommended to use the low-resolution stream: it loads fast, uses minimal resources, is thus best suited for a small frame. The resolution can be changed with the destination parameter. Supported destination values include low-resolution, remote, and local.
WARNING
Using the high resolution stream (local) for a Cards is not recommended, as it can cause the Home Assistant Dashboard to become sluggish with multiple cards.
type: custom:scrypted-nvr-camera
id: 42
destination: local
Audio
By default the Card live stream will mute both the microphone and the speaker (two way audio).
WARNING
Browsers will prevent autoplay with audio playback and microphone access prior to user interaction via a click event. The dashboard must be set to Allow on Chrome and Safari.
type: custom:scrypted-nvr-camera
id: 42
speakerOn: true
microphoneOn: true
Event Reel Card
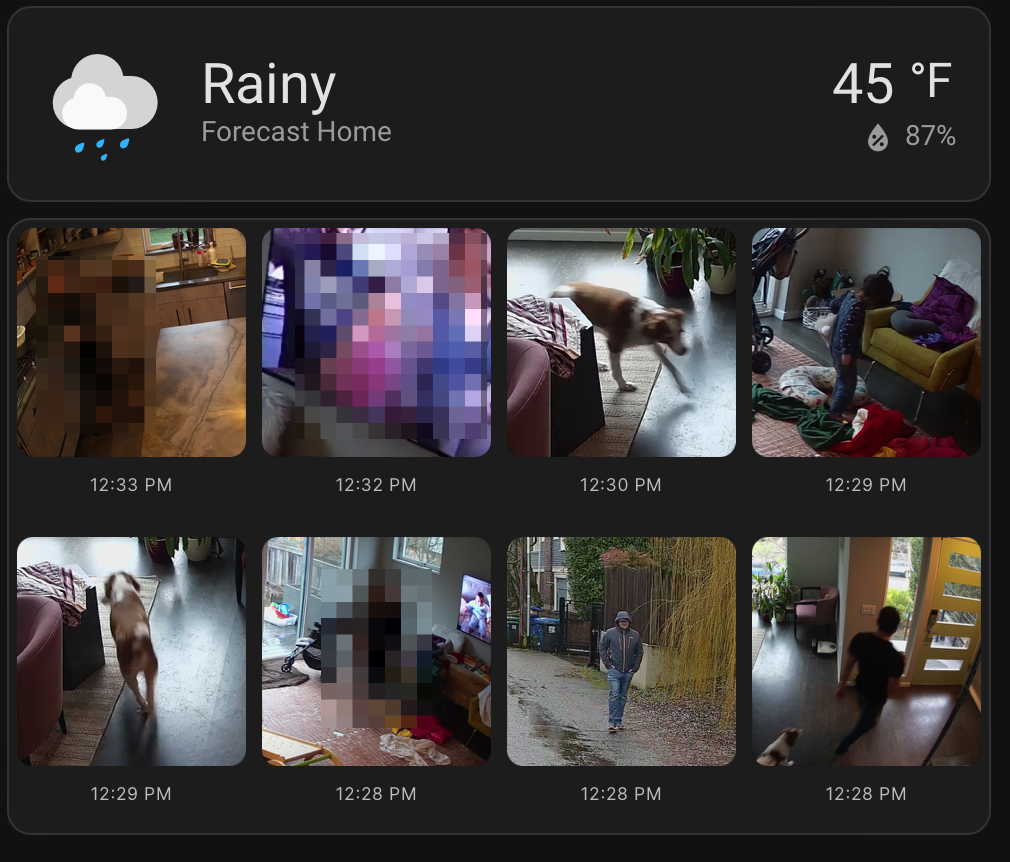
The Event Reel shows the recent highlighted events in a scrollable reel. The Event Reel card has its own parameters that can be used to used to customize the cameras and events shown:
| Name | Default Value | Description |
|---|---|---|
| ids | All Cameras | The camera ids shown in the reel. The ids parameter is a comma separated list of device ids to display in the camera grid. If this parameter is ommitted, all are shown by default. |
| hiddenDetections | Motion | The detection types to hide in the reel. Person, Vehicle, Animal, etc. All except generic Motion are shown by default. |
| cols | Responsive | The number of columns in the event reel. |
| count | cols | The total number of items to show in an event reel page. Can be combined with cols to create a reel with multiple rows. |
| aspectRatio | 1/1 | The aspect ratio of a detection thumbnail. |
| click | ha | The app that will be opened when clicked. Valid values include ha (Home Assistant), app (Scrypted NVR App), or none (do nothing). |
For example, for a 5x2 grid of events that only shows Person and Animal detections:
type: custom:scrypted-nvr-events-carousel
click: ha
count: 10
cols: 5
hiddenDetections:
  - Motion
  - Vehicle
Another example with all detections (unclassified Motion is filtered by default) but filtering events to specific cameras:
type: custom:scrypted-nvr-events-carousel
click: ha
count: 10
cols: 5
ids:
  - 42
  - 43
Click
The parameter click can be used to customize how click events are handled when the event reel is clicked.
| Value | Description |
|---|---|
ha | Navigate to the camera inside Scrypted within the Home Assistant companion app when clicked. |
popup | View the camera in a popup. |
popup-no-timeline | View the camera in a popup with no recording playback timeline. |
app | Open the Scrypted NVR app when clicked. |
none | Do nothing when clicked. |
Summary Reel Card
WARNING
This card is only available in the Scrypted NVR Beta plugin.
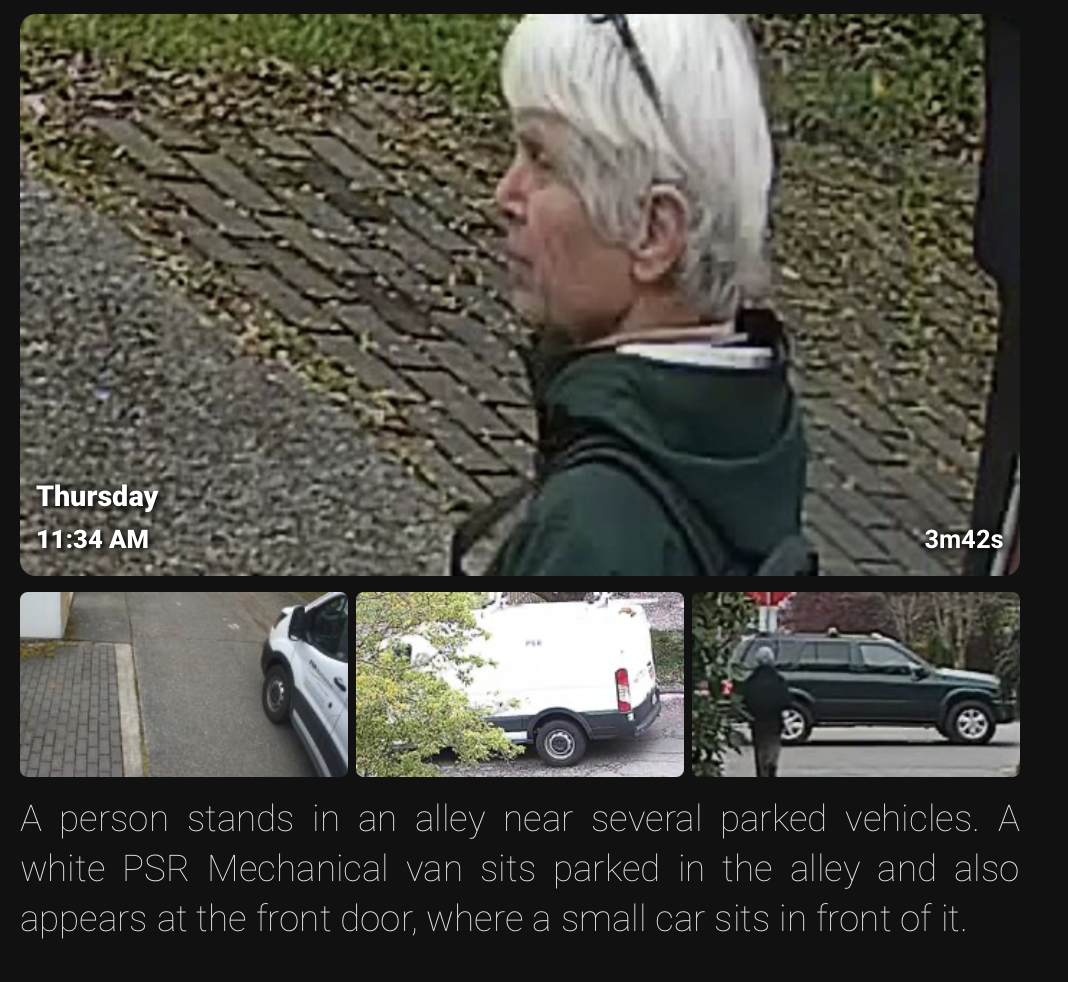
The Summary Reel shows the recent camera summaries in a scrollable reel. The Summary Reel card has its own parameters that can be used to used to customize the cameras and summaries shown:
| Name | Default Value | Description |
|---|---|---|
| id | N/A | The primary camera id shown in the reel. Other cameras that were summarized alongside this camera will also be shown in the smaller thumbnails. The Scrypted NVR Card id. |
| click | ha | The app that will be opened when clicked. Valid values include ha (Home Assistant), app (Scrypted NVR App), or none (do nothing). |
type: custom:scrypted-nvr-summary-carousel
id: 42
click: ha
Sizing Cards
Sizing cards in Sections view can be done using grid_options. For exampe, to make the Event Reel Card above full width:
type: custom:scrypted-nvr-events-carousel
click: ha
count: 10
cols: 5
hiddenDetections:
  - Motion
  - Vehicle
grid_options:
  columns: full
Note that the grid_options configuration contains the standard Sections view sizing parameters.
Styling Cards
Styles can be applied to cards using standard css styles. For example, applying a rounded border to the camera card:
type: custom:scrypted-nvr-camera
id: 42
style: "border-radius: 16px; overflow: hidden; aspect-ratio: 16/9;"
Notifications
WARNING
The Custom Component (and Addon setup, if applicable) must correctly be completed prior to setting up notifications.
Scrypted NVR Notifications can be delivered to the Home Assistant Companion app.
- Install and configure the Scrypted Cloud plugin. This is necessary to receive notification images.
- Install the Home Assistant Plugin for Scrypted.
- Configure the Home Assistant Long Lived Access Token (this is not the same token used in the previous steps) and Address in the Plugin Settings.
- The Home Assistant
notify(Notify Service) entities should sync. - Find the companion app
Notify Serviceentity within the Home Assistant Plugin. It will be named something similar tomobile_app_iphonex.
- Enable the
Scrypted NVR Usersextension.
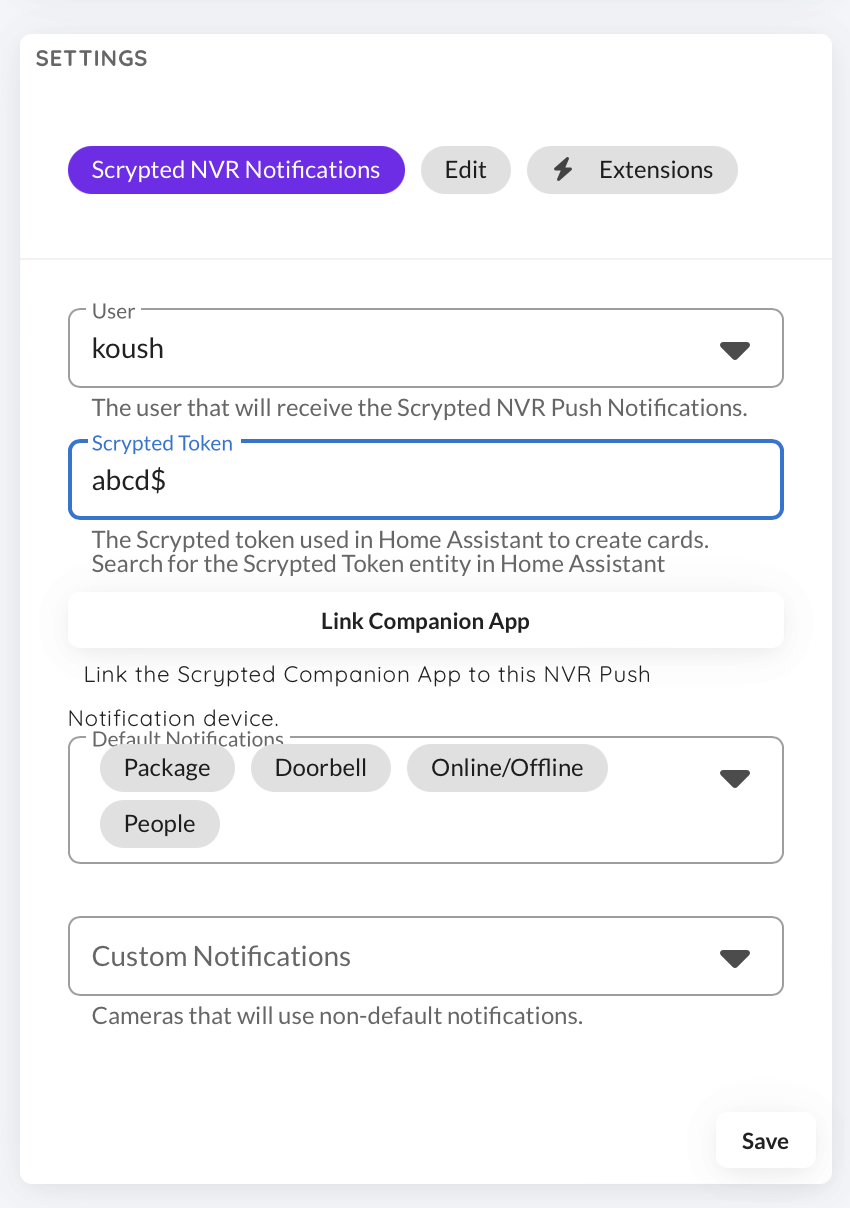
- Configure the following settings within the
mobile_app_iphonexdevice.
- Assign a
Scrypted User. - Paste the
Scrypted Tokenused by the Home Assistant Custom Component. - Click Save.
- After the settings have been saved, click the Link Companion App button. A notification will be sent to the companion app.
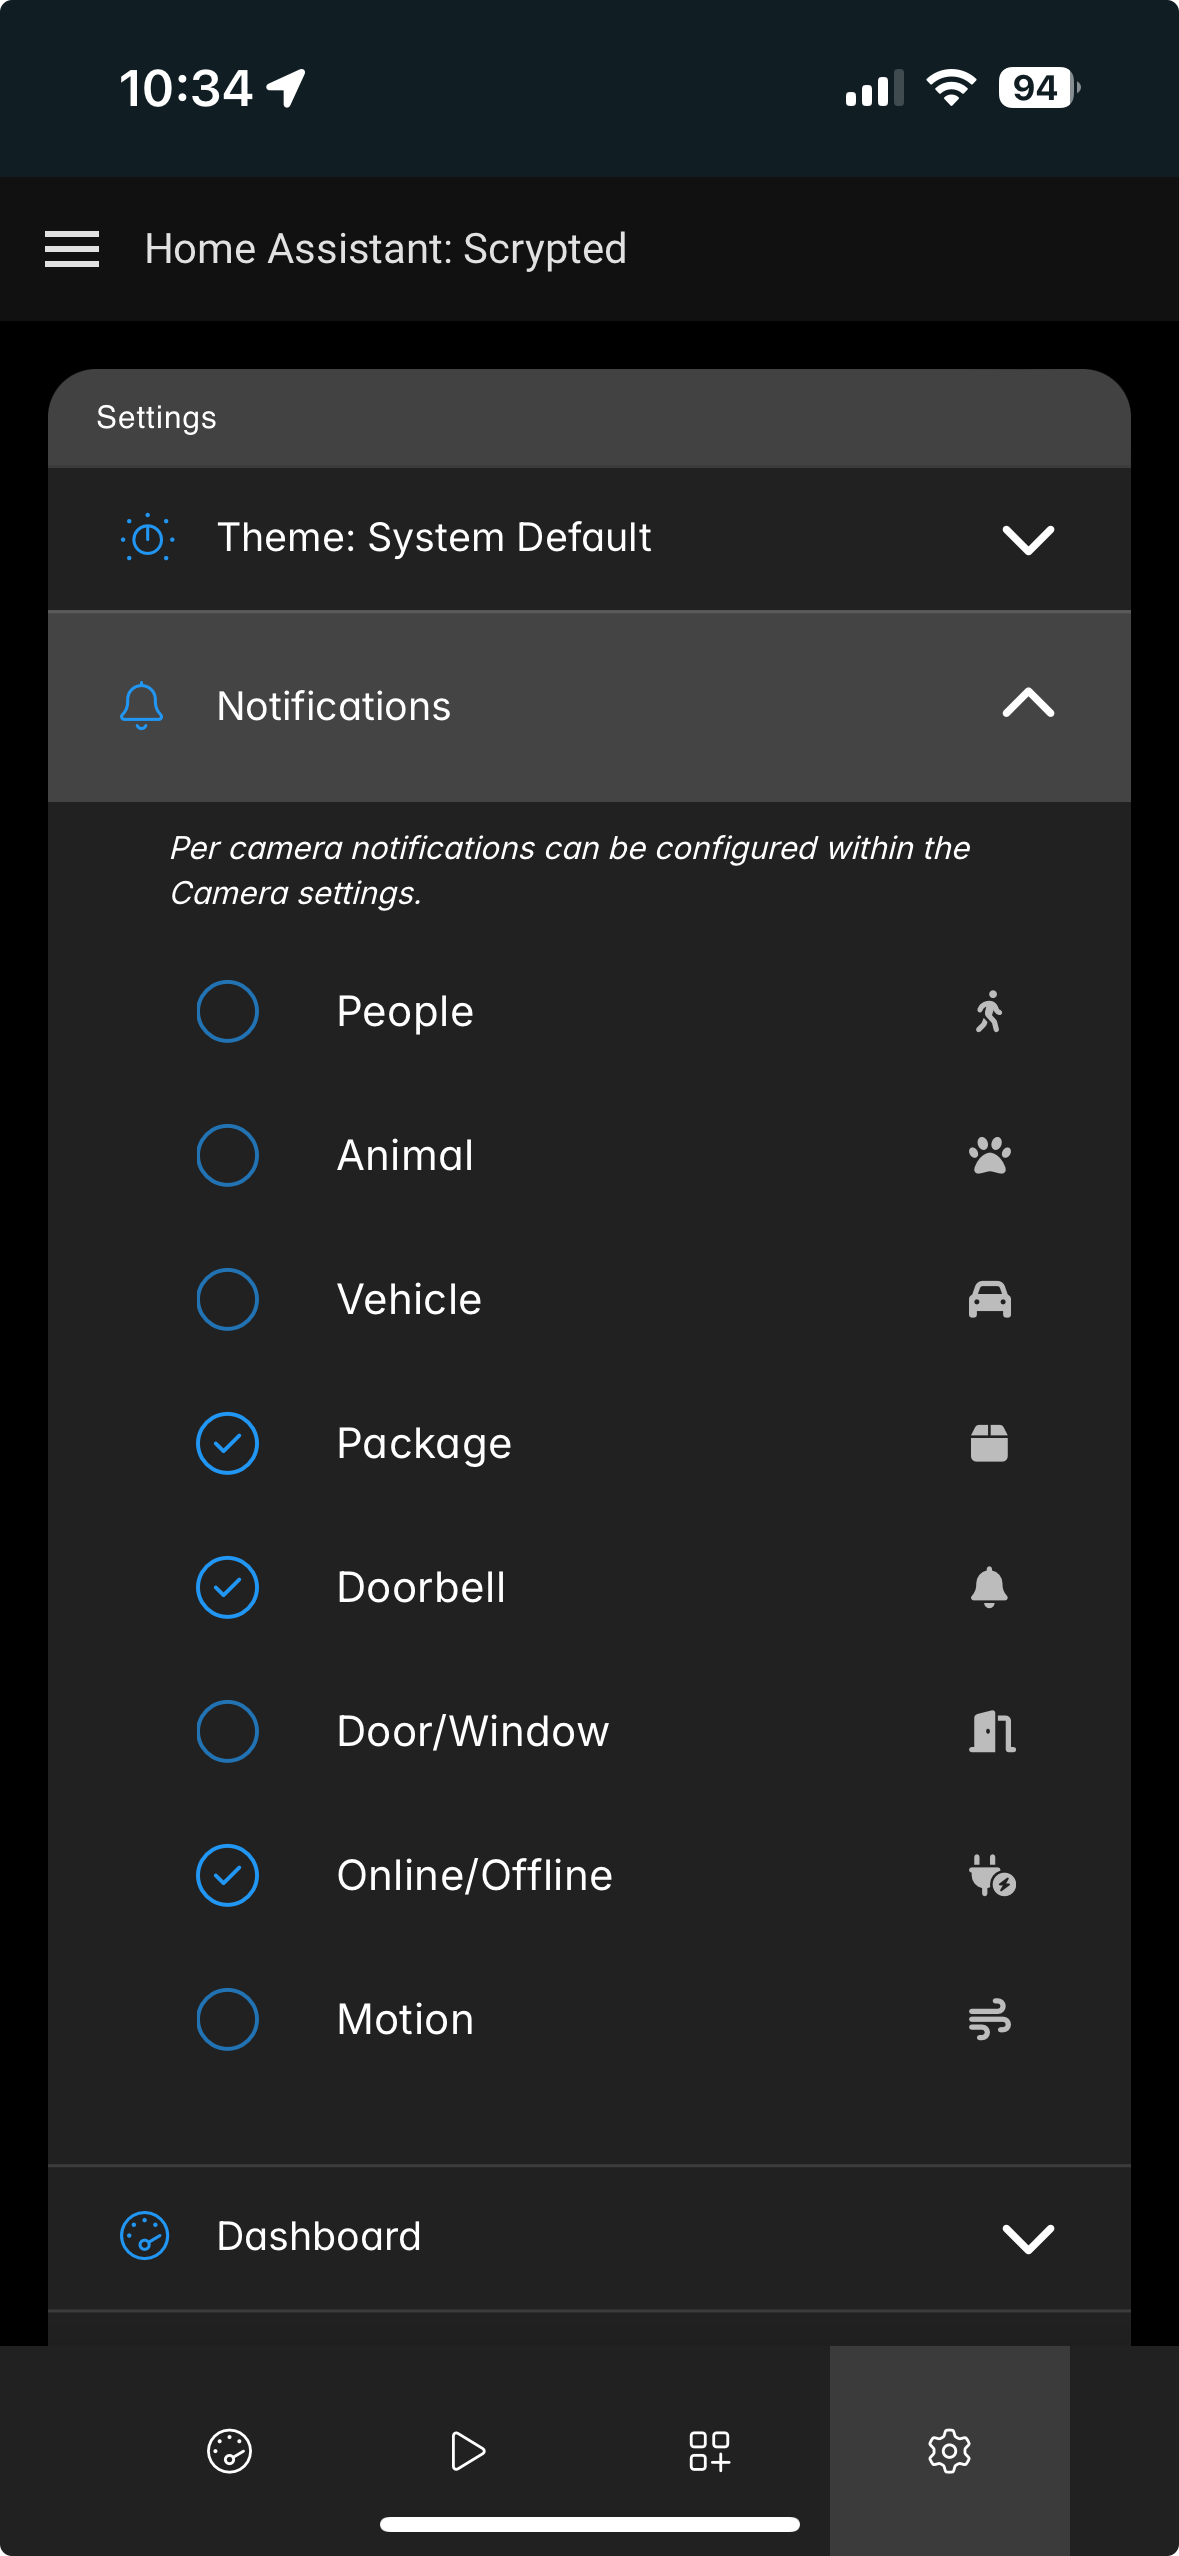
- Click the notification to complete linking and allow customization of notifications from the companion app.
- The Notification options can also be configured in the Scrypted Management Console.